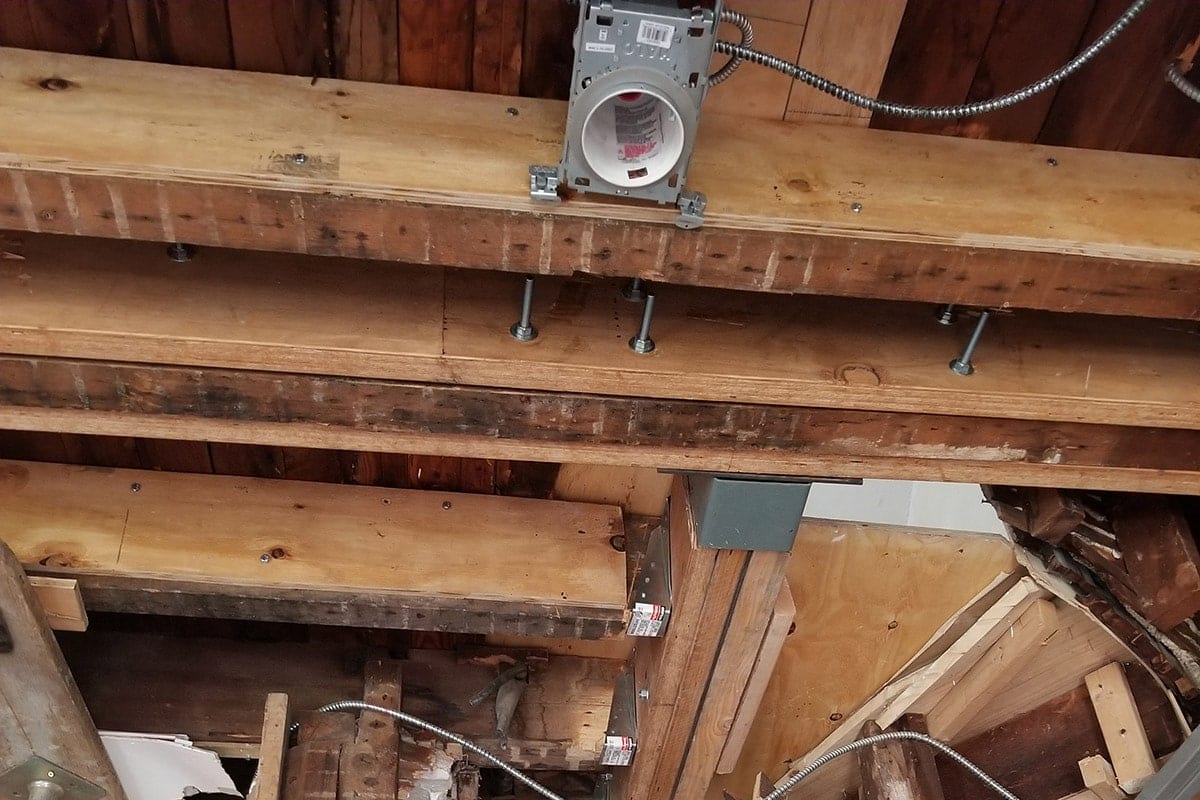
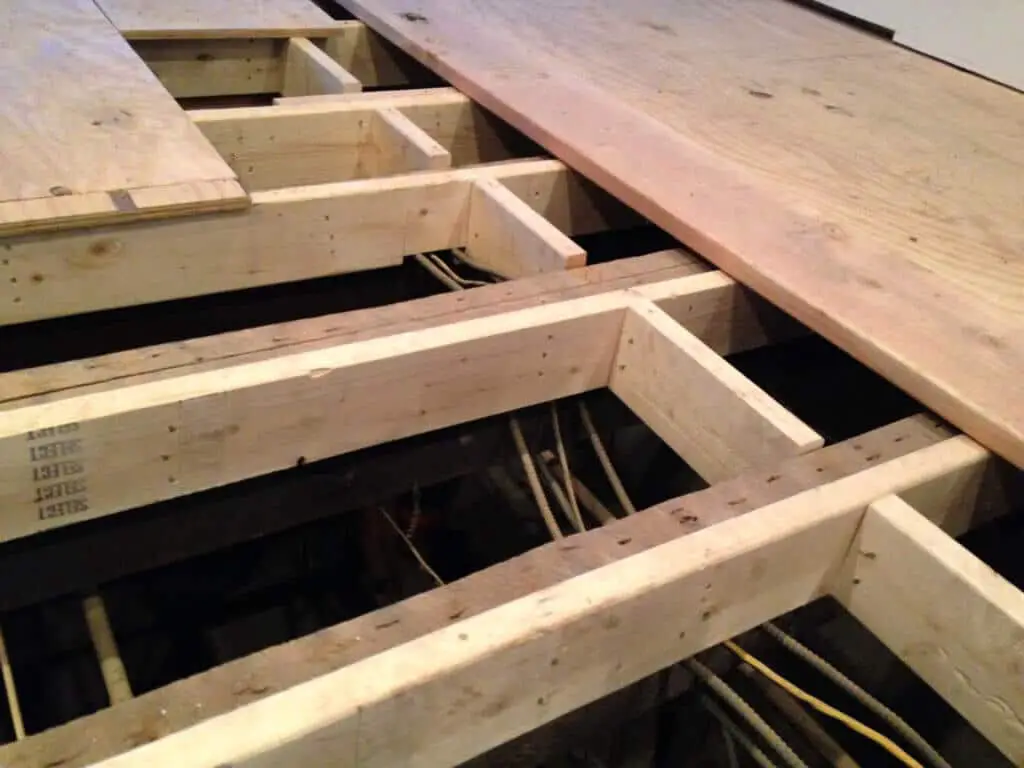
Imagine this: You’re walking across your living room, feeling a slight bounce in the floorboards. You look down and realize the floor isn’t as solid as it once was. This is a common problem, often caused by sagging floor joists, and it can be a real pain. Don’t worry; fixing it is achievable and within your grasp. The solution? Sistering floor joists. This technique involves attaching a new piece of lumber alongside the existing joist to create a stronger support system, effectively reinforcing the structure. This article will guide you through the step-by-step process of sistering a floor joist, turning a wobbly floor into a solid foundation for years to come.

Image: viewfloor.co
Before we dive into the details, let’s first explore what sistering really means. In construction, “sistering” refers to the practice of attaching a new piece of lumber parallel to and alongside an existing one, creating a stronger, combined beam. In this case, we’re applying this technique to reinforce floor joists, providing additional support where it’s needed most. Understanding this concept is vital for successfully tackling your floor joist repairs.
Getting Started: The Essential Tools and Materials
Before you embark on your “floor joist sistering” adventure, gather the necessary tools and materials. Here’s a checklist to ensure you’re fully equipped:
- New Floor Joist: Choose a piece of lumber with the same dimensions as your existing floor joist. Don’t skimp on quality; opt for lumber that’s strong and free of knots or defects.
- Structural Screws: Opt for screws specifically designed for structural applications, featuring a coarse thread and a strong, holding power. They are available at most hardware stores and are designed for heavy-duty applications like attaching floor joists.
- Drill: A corded or cordless drill with adjustable torque settings will make the process smoother. Having a variety of drill bits is also helpful for drilling pilot holes, which can prevent wood splitting.
- Tape Measure: Accurate measurements are crucial for ensuring proper spacing and aligning the new joist with the existing one.
- Level: A level is essential to ensure that your new floor joist is perfectly aligned with the existing one, preventing uneven floors and potential structural problems.
- Saw: You’ll need a saw to cut the new joist to the required length. A circular saw is often the preferred choice for this task, but a handsaw can also work effectively.
- Safety Glasses and Gloves: Safety is paramount during any construction project. Always wear safety glasses and gloves to protect yourself from flying debris and sharp tools.
- Jack or Support Beam: This will be used to temporarily support the section of the floor while you’re replacing the joist. A jack is an excellent option for this job, but you can also use sturdy pieces of lumber to create a temporary support beam.
Assessing the Damage: Identifying the Sagging Joist
The first step is to pinpoint the exact location of the sag. A sagging floor might be caused by multiple joists, but by carefully examining the floor’s movement, you can identify the primary culprit. Look for visible dips or bends in the floorboards. A slightly bent joist can also indicate weakness. If the flex is more severe, it’s likely a major issue, and sistering becomes essential. This step provides a clear target for your repair efforts, allowing for a focused and effective solution to the sagging floor problem.
Preparation is Key: Supporting the Floor
Once you’ve located the sagging joist, the next step is to provide temporary support for the floor. This is crucial for ensuring the floor’s stability during the repair process. Failure to properly support the floor could lead to further damage and even collapse. Consider using a jack to support the affected area of the floor. If a jack isn’t readily available, you can create temporary beams using sturdy lumber, propped up on sturdy supports. Remember to ensure that the jack or support beams sit solidly and securely, effectively distributing the weight of the floor for safety.

Image: floorcarekits.com
Cut and Secure the Sister Joist
Now it’s time to cut the sister joist to the required length. Carefully measure the existing joist, using your tape measure, and then cut the sister joist using your saw to match this length. Ensure a clean and precise cut. Next, attach the sister joist to the existing joist. You can use structural screws for this purpose. Remember to pre-drill pilot holes slightly smaller than the screw diameter to prevent wood splitting. Ensure the sister joist is tightly secured to the existing joist using multiple screws. For extra strength, consider using joist hangers to secure the sister joist to the existing joist. Joist hangers provide a strong, metal connection point, offering greater stability and peace of mind.
Finishing Touches: Attaching the Joist and Removing the Support
After securing the sister joist, check its alignment carefully using your level. If needed, adjust the position slightly to ensure a perfectly level floor. Once satisfied, remove the jack or support beams that were holding up the floor. The floor should now have a solid and stable feel. Depending on the extent of the sag, you might have to repeat this process of sistering for other joists in the floor.
Sealing and Finishing
After completing the sistering process, it’s crucial to seal the new joist with a suitable wood sealant. This will protect the wood from moisture, rot, and insects. The sealant acts as a barrier, enhancing the lifespan of the newly installed joist. Furthermore, consider sanding down the sister joist and painting or staining it to match the existing floor joist. This approach will help blend the new joist seamlessly with the existing floorboards, enhancing the visual aesthetics and creating a unified appearance.
Expert Insights: Tips for Success
Sistering floor joists is a common DIY repair, and it’s one that, with a little care and attention to detail, can be accomplished successfully. Here are several expert-backed tips to ensure a proper and lasting repair:
- Use high-quality lumber: Don’t compromise on the materials. Invest in quality lumber that is free of knots, cracks, or other imperfections. This will ensure that the new joist is strong and durable, capable of handling the stresses associated with supporting the floor.
- Securely fasten the joists: Use an ample number of screws and make sure they are driven deeply into the wood for maximum holding power. This will ensure that the sister joist is firmly attached to the existing joist, creating a strong and integrated system.
- Consider adding additional support: For extra support, you can install a temporary beam, or “strong back,” alongside the sister joist. This provides extra strength and stability to the floor.
Best Way To Sister A Floor Joist
Conclusion
By following this comprehensive guide, you’ve gained the knowledge and skills to confidently tackle that sagging floor and restore your home to a solid foundation. Sistering floor joists is an effective DIY project that can save you significant costs. Embrace this process, enjoy the sense of accomplishment, and take pride in your newly restored floor. Remember, if you’re uncertain about tackling this project alone, don’t hesitate to consult a licensed contractor for professional guidance.


