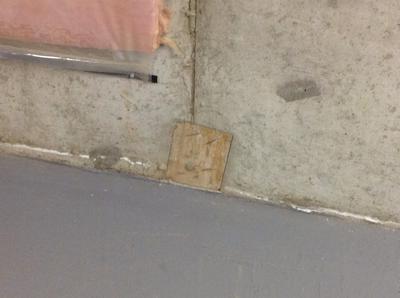
Imagine walking into your beautiful new home, only to be greeted by a pesky draft whistling through a gap between the floor and wall. Or maybe you notice a growing accumulation of dust and debris in that tiny crevice. This unwelcome gap can be both an aesthetic and a functional nuisance, disrupting your home’s comfort, energy efficiency, and even affecting the health of your family. It’s a common problem, but luckily, it’s also a solvable one. This guide will arm you with everything you need to conquer those pesky gaps and achieve a more harmonious, comfortable, and healthy living space.

Image: viewfloor.co
Sealing gaps between the floor and wall is more than just a cosmetic fix. It’s a way to improve your home’s energy efficiency, reducing drafts and heat loss, saving you money on your energy bills. This also helps create a healthier indoor environment by preventing dust, allergens, and pests from sneaking in. Finally, a seamless floor-wall transition adds a polished touch to any room, enhancing its overall aesthetic appeal.
Understanding the Source of the Gap
Before diving into sealing solutions, it’s important to understand why the gap exists in the first place. This helps determine the most appropriate and effective sealing approach. Here are some common culprits:
- Uneven flooring: Inconsistent subfloors, uneven installation, or settling over time can lead to gaps between the floor and walls.
- Movement in the house: Natural expansion and contraction of building materials due to temperature and humidity fluctuations can create gaps where the floor meets the wall.
- Poor installation: An improperly installed floor or baseboard can leave substantial gaps.
- Insufficient expansion gaps: Flooring materials need space to expand and contract. If expansion gaps are too small or non-existent, gaps can form along the wall.
The Right Tools for the Job: Sealing Materials and Techniques
With the gap’s origin understood, we can now explore the best tools to conquer it. The following materials and techniques, each with their pros and cons, provide effective solutions based on your specific needs and preferences:
1. Silicone Caulk:
- Pros: Silicone caulk is readily available, easy to apply, adheres well to various surfaces, and is flexible enough to accommodate minor movement. It’s water-resistant and suitable for moist areas like bathrooms and kitchens.
- Cons: Silicone caulk isn’t paintable, and it can be difficult to remove once dried. While flexible, it may not be the best choice for larger gaps that experience significant movement.

Image: phenergandm.com
2. Polyurethane Caulk:
- Pros: Polyurethane caulk is durable, resistant to moisture, and offers excellent adhesion. It’s often favored for its ability to fill larger gaps. Many polyurethane caulks come in paintable versions.
- Cons: Polyurethane caulk can be harder to work with than silicone, and it expands as it dries, which can lead to overfill if not applied carefully.
3. Acrylic Latex Caulk:
- Pros: Acrylic latex caulk is water-based, making it easy to clean up with soap and water. It dries quickly, has a smooth finish, and is paintable.
- Cons: Acrylic latex caulk is less durable than silicone or polyurethane and may not be the best choice for high-traffic areas or spaces with extreme temperatures.
4. Wood Filler:
- Pros: Wood filler is ideal for larger gaps or areas needing a more solid, permanent seal. It can be sanded smooth for a seamless finish and painted to match your baseboards.
- Cons: Wood filler requires a bit more preparation and may be harder to apply than caulk. It’s not as flexible as caulk, so it may crack over time if the gap is prone to movement.
5. Weather Stripping:
- Pros: Weather stripping is a versatile solution for sealing gaps around doors and windows, and it can also be applied to floors. It’s available in various materials like foam, rubber, and metal, allowing you to choose the best fit for your needs.
- Cons: Weather stripping is typically used for smaller gaps and may not be as effective for larger or uneven gaps.
Expert Tips for Sealing Success:
Here are some pro-tips to ensure a seamless, long-lasting seal:
- Clean the Gap: Thoroughly remove dirt, dust, and debris from the gap before applying any sealing material to achieve optimal adhesion.
- Use a Caulking Gun: For even, controlled application, use a caulking gun. Ensure it’s properly fitted with the appropriate nozzle size for your selected caulk.
- Apply Smoothly: With a steady hand, apply the caulk in a continuous, uninterrupted line, pressing it firmly against the gap. Ensure no air pockets or voids are left behind.
- Smooth and Finish: Use a damp finger or a caulking tool to smooth the caulk and create a clean, even finish. Remove any excess caulk immediately.
- Let it Cure: Allow the sealant to cure completely as per the manufacturer’s instructions before painting or applying any additional coats.
Best Way To Seal Gap Between Floor And Wall
A Final Thought:
Sealing the gap between your floor and wall is a simple yet impactful home improvement project that offers a multitude of benefits. With the right tools, techniques, and a bit of determination, you can create a more comfortable, energy-efficient, and visually appealing home. Remember, it’s not just about sealing a gap, it’s about improving your overall living experience. So, embrace the challenge, equip yourself with the knowledge, and let your creativity flow! And if you’re not confident tackling this project on your own, don’t hesitate to seek professional assistance. A skilled contractor can effectively address any complex issues and ensure a flawless finish. But regardless of your chosen path, enjoy the satisfaction of a job well done and the beautiful results it brings to your home!


