Have you ever looked at a beautiful photo and thought, “I wish that object was a different color?” Maybe you’re working on a design project and need to change the hue of an element to perfectly match your brand palette. Or perhaps you just want to experiment and see what your image would look like with a splash of vibrant color. Whatever your reason, the ability to change the color of an object in Photoshop is a fundamental skill for anyone who works with images, whether for personal or professional purposes.

Image: colesclassroom.com
This comprehensive guide will take you step-by-step through the process of changing the color of an object in Photoshop. We’ll explore various techniques, from simple color adjustments to advanced masking and blending. By the end of this article, you’ll be confident in your ability to transform any image with a few clicks and a little finesse.
Choosing the Right Tool: A Quick Overview
Photoshop offers a wealth of tools for color manipulation. Understanding their strengths and limitations will help you choose the most effective method for your project:
- Hue/Saturation Adjustment: This is a great starting point for quick, global color changes. It allows you to adjust the hue, saturation, and lightness of an image as a whole or specific color ranges.
- Color Balance: This is for more nuanced color adjustments, focusing on the balance of red, green, and blue tones.
- Selective Color: This tool allows you to fine-tune the color of specific color ranges within your image, giving you greater control over the results.
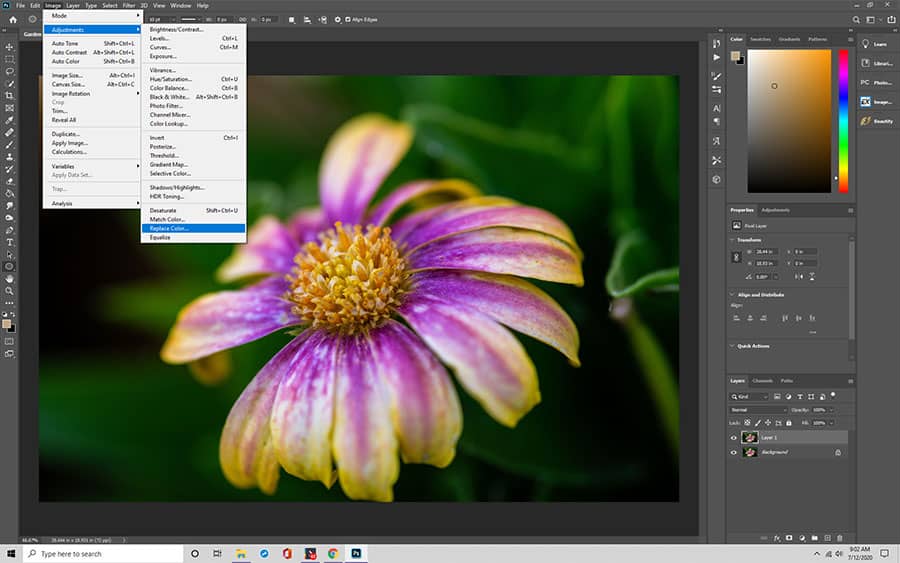
- Replace Color: This is ideal for making precise changes to a specific color in your image. You can choose a source color and replace it with your desired color.
- Channels: For advanced users, channels offer ultimate precision. They allow you to isolate specific color channels (Red, Green, Blue) to make subtle or dramatic changes to the overall colour composition.
- Color Range: This tool lets you select a range of colours within an image and apply adjustments or effects to them.
Mastering the Basics: Hue/Saturation Adjustment
Let’s start with the most fundamental approach: the Hue/Saturation adjustment. This method is simple and versatile, making it perfect for beginners.
- Open your image in Photoshop.
- Find the Adjustments menu. You can easily access this from the Image menu or by clicking on the “Adjustments” button in the Layers panel.
- Select “Hue/Saturation.” This will open a dialog box with sliders for Hue, Saturation, and Lightness.
- Make your adjustments. You can use the Hue slider to change the overall color of the selected object. The Saturation slider controls the intensity of the color, and the Lightness slider changes the brightness.
- Preview your changes. Toggle the “Preview” checkbox on and off to see the adjustments in real-time.
- Click “OK” to apply the changes to your image.
Getting Specific: The Selective Color Tool
For more precise color alterations, the Selective Color tool is your go-to option. This robust tool allows you to target specific color ranges within your image and adjust their properties independently.
- Open your image and select the “Selective Color” adjustment.
- Select a color range. The dialog box shows you the different color ranges, such as Reds, Yellows, Greens, Cyans, Blues, and Magentas. Choose the color range that corresponds to the object you want to change.
- Make your adjustments. You’ll have sliders for Cyan/Magenta, Yellow/Blue, and Black/White. Play with them to affect the hue, saturation, and lightness of your selected color range.
- Preview your changes. Make adjustments until you’re happy with the result.
- Click “OK” to apply the changes.

Image: graphicdesign.stackexchange.com
Power Up Your Edits: Combining Techniques
Sometimes, a single adjustment might not be enough to achieve the exact look you’re after. That’s when combining different techniques becomes crucial. For example, you can use the Hue/Saturation tool to make a quick color adjustment and then fine-tune the result with the Selective Color tool. This combination allows for a more controlled and natural outcome.
Beyond Basic Color Changes: Advanced Methods
With practice, you can master more complex techniques for transforming the color of objects in Photoshop. These methods offer ultimate flexibility and control:
- Masking: Masking lets you isolate specific areas of your image. After creating a mask, you can apply adjustments or effects selectively to the masked area, ensuring that your changes only affect the desired object.
- Color Blending: For seamless colour integration, you can use blending modes to create realistic transitions between colors. This method allows you to overlay colors, blend them gently, or create interesting effects.
Tips for Success
- Experiment and play around with the tools! There’s no right or wrong way, and experimenting will help you discover new techniques and find your own style.
- Use the “History” panel to track your edits and easily undo any changes you don’t like.
- Always work on a copy of your image to prevent any irreversible changes to the original.
- Look for tutorials and resources online to continue expanding your knowledge of Photoshop.
How To Change Color Of An Object In Photoshop
Conclusion: Empowering Your Creativity
Changing the color of objects in Photoshop opens up a world of possibilities for your creativity. From simple colour tweaks to complex transformations, the tools and techniques you’ve learned in this guide will give you the power to bring your visions to life. So go forth, experiment, and let your imagination run wild! Remember, practice makes perfect, and with each project, you’ll gain more confidence and mastery.


