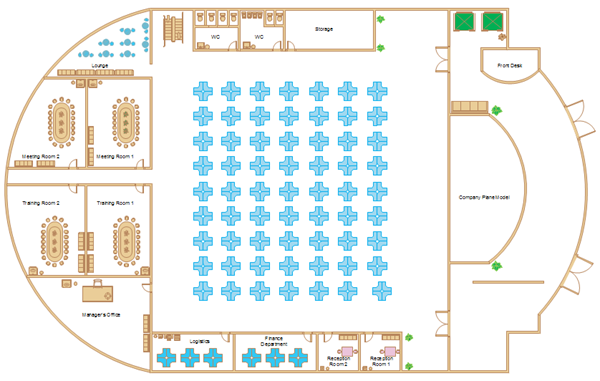
Have you ever dreamt of designing your own home or office space? Or perhaps you’re planning a remodel and need to visualize the layout. Creating a floor plan is an invaluable tool for any homeowner, designer, or even just someone looking to rearrange their furniture. While dedicated floor plan software exists, there’s a surprising solution right at your fingertips: Microsoft Office.

Image: mydiagram.online
From the humble beginnings of simple sketches to the complexity of advanced 3D models, Microsoft Office offers unexpected capabilities for creating floor plans. Whether you’re a tech novice or a seasoned user, this guide will walk you through the process, providing tips and tricks to unleash your inner designer.
Using Microsoft Word for Basic Floor Plans
For simple floor plans, Microsoft Word can be a surprisingly effective tool. While not as specialized as dedicated software, its ease of use makes it perfect for quick sketches and basic layouts. Let’s break down the process:
1. Start with a Grid
Begin by creating a grid using Word’s table feature. The number of rows and columns corresponds to the room’s dimensions. You can adjust the cell size to scale the grid to your desired measurement.
2. Incorporate Shapes
Word’s “Insert” tab offers a variety of shapes, including rectangles, squares, and circles. These are ideal for representing furniture, appliances, and other objects in your floor plan. Simply drag and drop the shapes onto your grid, resizing them as needed.

Image: www.elevate.in
3. Add Walls and Doors
Use Word’s drawing tools to create lines for walls and doorways. You can adjust the thickness and color of these lines to suit your preference. Utilize the “Format” tab to fine-tune the appearance of your lines.
4. Labels and Annotations
Word’s text boxes allow you to add labels to your floor plan. You can identify furniture, indicate measurements, or provide any other relevant information. Remember to choose a clear and easily readable font.
5. Customize & Enhance
Word’s vast collection of design elements lets you personalize your floor plan. Add color fills, borders, and even textures to enhance the visual appeal of your design. Experiment with the “Format” and “Shape Styles” options to refine your creation.
Leveraging Microsoft PowerPoint for More Complex Floor Plans
For those seeking a more sophisticated floor plan creation experience, Microsoft PowerPoint presents an excellent alternative. While primarily designed for presentations, PowerPoint’s visual tools can effectively handle complex designs:
1. Embrace the Canvas
PowerPoint’s “Slide” acts as your design canvas. Unlike Word’s grid-based approach, you have complete flexibility to arrange and manipulate your elements within the slide boundary.
2. Utilize SmartArt Graphics
PowerPoint’s SmartArt graphics can provide a visual starting point for your floor plan. These pre-designed layouts can easily be customized with your specific measurements and styles.
3. Master Shapes and Lines
PowerPoint’s extensive shape collection includes specialized options for floor plan design, such as curved walls, rounded doors, and even furniture silhouettes. You can also utilize the “Line” tool to create walls, doorways, and room dividers with precision.
4. Design Flexibility
PowerPoint allows you to layer and group objects, enabling you to create intricate details in your floor plan. You can also add depth and perspective using various visual effects.
5. Export Options
Once completed, your PowerPoint floor plan can be exported as a high-resolution image or even a PDF file, allowing you to share your design with ease.
Microsoft Visio: The Professional’s Choice
For those who demand the most professional and comprehensive floor plan creation experience, Microsoft Visio is the ultimate solution. Designed specifically for diagramming and visualization, Visio provides unparalleled power and flexibility for creating detailed and accurate floor plans.
1. Specialized Templates & Stencils
Visio offers a rich library of pre-built templates and stencils specifically designed for floor plan creation. These include various furniture, appliances, fixtures, and architectural elements, simplifying the design process.
2. Precise Measurements & Scaling
Visio provides advanced measurement and scaling tools, ensuring precise dimensions and accurate representation of your space. You can easily adjust your floor plan to match real-world measurements.
3. Smart Connections & Relationships
Visio’s smart connection features automatically connect objects and elements in your floor plan, ensuring consistency and preventing misalignment. This is particularly helpful for complex layouts with numerous walls, doors, and windows.
4. Collaboration & Sharing
Visio’s collaborative capabilities allow multiple users to work on the same floor plan simultaneously, facilitating teamwork and streamlining the design process. You can also easily share your floor plan with others through various formats, including PDF, image, and Visio’s native format.
Tips and Expert Advice
Creating a successful floor plan requires more than just tools. Here are some expert tips to enhance your design process:
1. Consider Measurement Accuracy
Always prioritize accurate measurements when creating your floor plan. Use a tape measure to record the precise dimensions of your space, ensuring your design reflects reality.
2. Leverage Existing Blueprints
If you have existing blueprints or architectural plans, utilize these as a starting point. This provides a reliable foundation for your design, saving time and effort.
3. Plan for Function and Flow
Consider the intended function of each area in your floor plan. Ensure furniture placement facilitates optimal movement and flow within the space, maximizing usability and comfort.
4. Scale and Proportionality
Maintain consistent scale and proportion throughout your floor plan. This ensures that furniture and objects appear realistic in relation to the overall space.
5. Seek Feedback and Iterate
Once you have a preliminary floor plan, share it with others for feedback. Their insights can help you identify potential areas for improvement and refine your design.
FAQ (Frequently Asked Questions)
Q: Which Microsoft Office program is best for creating floor plans?
A: The best program depends on your needs. Word is ideal for basic layouts, PowerPoint offers more artistic flexibility, and Visio provides the most professional and detailed design capabilities.
Q: Can I create a 3D floor plan using Microsoft Office?
A: While not directly, you can achieve a 3D effect in PowerPoint using 3D shapes and visual effects. Visio offers some limited 3D features, but it’s not its primary focus.
Q: Are there any free alternatives to Microsoft Office for floor plan creation?
A: Yes, several free floor plan software programs are available online, such as Roomstyler, Floorplanner, and Sweet Home 3D. These offer varying levels of features and complexity.
Creating A Floor Plan With Microsoft Office
Conclusion
Creating a floor plan using Microsoft Office is a surprisingly accessible and rewarding endeavor. Whether you need a simple sketch or a detailed professional design, Microsoft offers tools to suit your needs. From the ease of Word to the artistic capabilities of PowerPoint and the professional-grade features of Visio, you have options at your fingertips.
Are you ready to unleash your inner designer and craft your dream layout? Start experimenting with Microsoft Office today and see what your imagination can create!


